You are here
GOTW: 2016.06.08

The 2016 Nova Scotia Open (May 13-15, 2016) saw 31 players compete at Saint Mary's University in Halifax. The Open section ended in a three-way tie for 1st between Antoni Wysocki, Adam Dorrance, Jason Manley, each with 4/5.
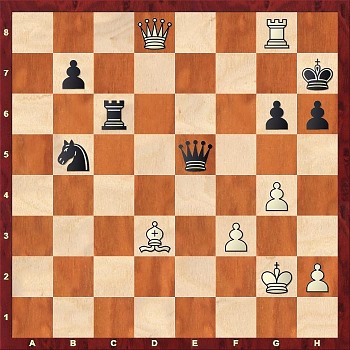
The position in the diagram comes from our GOTW between the co-winners. It's White to move.
Notes by Elias Oussedik.
..
() - ()
Round: Result:
Round: Result:
[Event "Nova Scotia Open"]
[Site "Halifax"]
[Date "2016.05.15"]
[Round "4"]
[White "Manley, Jason"]
[Black "Dorrance, Adam"]
[Result "1/2-1/2"]
[ECO "A37"]
[WhiteElo "2157"]
[BlackElo "2279"]
[Annotator "Elias Oussedik"]
[PlyCount "103"]
[EventDate "2016.05.15"]
[SourceTitle "CFC Newsfeed"]

1. Nf3 {We rarely have games from the Maritimes, so I thought I would annotate
one. This game comes from the recently concluded Nova Scotia Open. It was a
fairly strong tournament for Maritime standards, with numerous 2200+ players.
The favorite coming into the tournament was Adam Dorrance. Adam is a high
school senior who boasts a 2250 FIDE rating and a 2270 CFC rating. His claim
to fame is his nine first place finishes at the Canadian Chess Challenge.} c5
2. c4 Nc6 3. g3 {Jason is playing a quiet position. Jason is a player from
Moncton, New Brunswick. He is a Science/Arts major attending the University of
New Brunswick.} g6 4. Bg2 Bg7 5. e3 {White has many different ideas in this
position. Jason chooses the less popular but entirely logical e3. More common
in this setup is to either play d4 immediately or to play Nc3 with a quick a3
Rb1 and b4. The latter being a setup that GM Kovalyov enjoys playing.} (5. O-O
Nf6 6. Nc3 O-O 7. d4 $14 {This is much more common. Mihail Marin has written a
great book on this position.  editor - see Chapters 6 & 7 of "The English
Opening" vol.3 (Quality, 2010).}) 5... e5 {A good move by Adam. White's idea
with e3 is to play a quick d4. With e5, Black prevents White from playing d4.}
6. Nc3 Nge7 {Why develop one's knight to e7 instead of f6? To push ...f5 and
control more central squares!} 7. O-O d6 8. d3 {White has accepted the fact
that he won't be able to play a d4 and decides to focus on development. White
will develop his pieces logically then decide where he will breakthrough. In
such positions, the white knight on f3 is often better placed on e2 to support
possible f4 breaks.} O-O 9. a3 {White is playing in a very interesting manner!
He is masking his real plan. Will White be going for a b4 type of plan? Will
he try to breakthrough with d4? Will he reroute his f3-knight and push f4?
There are numerous plans in this position - this is the beauty of these 1.Nf3
and 2.c4 openings. The possibilities are endless!} Be6 $6 {I don't
particularly like this move. Of course the bishop belongs on e6, but Black
should typically always play ...h6 before playing his Bishop to e6, to prevent
the white knight from going to g5.} (9... h6 $11 {Black's plan here is to
continue with Be6, Kh7, Qd7, Rad/e8, and then with either ...d5 or ...f5!}) 10.
Qc2 {White is playing in an interesting manner which isn't necessarily so bad.
White isn't committing to a strict plan at the moment and simply improving the
placement of his pieces. As Black, such moves can be very troublesome to meet.
If you don't know what White's plan is, how can you prevent it!?} Rb8 $6 {
Black doesn't seem to understand this position. This rook belongs on d8 or e8
and an ensuing ...d5 needs to be planned.} (10... h6 11. Rb1 d5 12. cxd5 Nxd5
13. Bd2 Rc8 $15 {This is a hedgehog-like position. Black should be completely
fine here as his pieces are ideally placed.}) 11. Rb1 {Hoping for b4.} a5 {
Black seems to have switched plans. What was Black's idea with Rb8? Was it to
play b5? Now that White has played Rb1 "threatening" b4, Black decides to play
...a5, preventing that idea. However, the rook on b8 has lost its utility.} 12.
b3 h6 $1 {Finally, preventing Ng5! An exclam for finally playing this move!}
13. Bb2 Qd7 {Connecting the rooks and hopefully bringing the b-rook to d8 soon.
} 14. Nb5 {I don't particularly like this move. White should be opting for
Rfe1 and trying to force d4.} (14. Rfe1 Rbd8 15. Rbc1 b6 16. d4 $11) 14... Rbd8
15. Rbd1 {White is simply shuffling his pieces and is waiting to see what
Black will do.} Bg4 (15... b6 {b6 was possible here, with the idea of
protecting c5 and then continuing with d5 next move.}) 16. Rd2 f5 {Black is
hoping to play ...f4 which will be a gamble. By playing ...f4, Black will
weaken his light squares (notably e4).} 17. Ne1 {A strange move, what is
White's idea? Did White want to play f4 himself?} f4 {And so here it comes!
Black is trying to open lines against White's king at the cost of weakening
some important light squares!} 18. exf4 exf4 19. Bxg7 Kxg7 20. Qc3+ Kh7 21. f3
$2 {A poor positional move. White shuts down his light squared bishop.} (21.
Nc2 f3 22. Bh1 Nf5 $13 {This position seems extremely unclear but most likely
dynamically equal. If White is able to eliminate Black's pawn on f3, he will
be better as his Bishop will be active.}) 21... Be6 22. d4 cxd4 23. Nxd4 d5 $2
{Black was getting low on time and started playing dubious moves. Black
shouldn't give White the chance to take the bishop on e6.  Black's bishop
controls a lot of light squares, and with the position being open, a knight is
much more valuable than a bishop.} (23... Nxd4 24. Qxd4 fxg3 25. hxg3 Nf5 {
This was a much better continuation. Suddenly Black's pieces jump to life.} 26.
Qf2 a4 $15) 24. Nec2 Qc8 25. Re1 {Simple and strong - gaining a tempo. Nxe6,
winning the bishop was also an acceptable alternative.} Bg8 26. c5 $1 $16 {
And White is much better! White has strong control on the d4 square and Black
has a weak d5 pawn. Likewise, Black's bishop on g8 is now extremely passive
while White can prepare a Bf1-d3 maneuver.} Qb8 27. g4 $1 {Another nice move
by Jason. Closing the kingside and preparing to re-route his bishop.} Rd7 28.
Rde2 (28. Bf1 {I preferred Bf1.}) 28... Qd8 29. b4 axb4 30. axb4 Nxd4 31. Nxd4
Nc6 32. Ne6 Bxe6 33. Rxe6 {White's pieces are getting active. Before going for
this variation, I would have preferred White already have his g2-bishop on d3.
This is the "do not hurry" principle. White already has a beauty of a position
and he doesn't need to rush with anything. Black has absolutely no counterplay.
} d4 34. Qd3 Rg8 35. b5 Na7 36. Bf1 {Finally!} Qa5 37. Re7+ Rg7 38. Rxg7+ Rxg7
39. Re4 {I had the chance to talk to Jason about this game and he told me:
"After 39 Re4, I was confident that my position was winning" and rightfully
so! Black's knight is extremely passive and White can start picking pawns with
Rxf4 or attack Black's king with such moves as h4-h5.} Qb4 40. Qxd4 Qa3 41.
Rxf4 Qc1 {Two pawns for White and Black has passive pieces! Likewise, White
had 25 minutes here to Black's three minutes. No way Black can save this
position, right?} 42. Rf8 {Jason is going for mate!} Nxb5 43. Qd8 Qxc5+ 44. Kg2
Rc7 45. Bd3 {Missing a forced mate!} (45. Bxb5 $18 {Easiest is simply to take
the knight and then the rook on c7.}) (45. Rh8+ Kg7 46. Rg8+ Kh7 47. Qe8 {
Threatening Qxg6#.} Qd6 {Covering g6.} 48. Bd3 {Threatening Bxg6 and mate to
follow.} Qxd3 49. Rh8+ Kg7 50. Qf8# {The queen left the f8 square and it's
mate!}) 45... Qe5 {After this move, Jason tells me: I completely missed 45 ...
Qe5, thinking I was forcing mate with 45.Bd3.} 46. Rg8 Rc6 47. Qf8 $2 (47. Re8
$142 $18 {is the simplest: gains a tempo and puts the Rook on a safe square
before putting a major on the 7th - editor}) (47. Kh3 $1 $18 {is a fancy way
of making the K safe before going for mate - editor}) 47... Rc2+ $3 {Brilliant
move! But what happens after Bxc2?} 48. Bxc2 Qe2+ 49. Kg3 Qe1+ {Taking Jason's
words: I was astonished when I looked at the position at move 49 and realized
there was no way to avoid the checks} 50. Kf4 Qd2+ 51. Kg3 ({editor -} 51. Ke5
Qd4+ 52. Ke6 Nc7+ 53. Kf7 Qd5+ 54. Ke7 Qc5+ $11) 51... Qe1+ 52. Kf4 {And a
draw via repetition.   An astonishing game! White played quite well after
Black blundered positionally with 23...d5, but this is why these young juniors
are so tough to play against - their resilience and resistance can be quite
bothersome. Both Jason and Adam ended up finishing tied for first in the
tournament.} 1/2-1/2
merida
46
..
Category:
© 2013-20 CFC & McGill Students' Chess Club
Designed by Shao Hang He.